Extension-based data ingestion is available under early access.
Enhanced features
The following table summarizes the key features enabled by extension-based data ingestion and their availability in Community and Enterprise editions of BloodHound:| Feature | ||
|---|---|---|
| Pathfinding | ||
| Environment filtering | ||
| Custom node icons and colors | (API-only) | (schema-defined) |
| Findings and remediation |
Extensions
Extensions define the structures that shape OpenGraph data in BloodHound for specific identity providers, cloud services, or other third-party platforms. They require data payloads to conform to an extension schema. See the following table for important terms and definitions related to OpenGraph data and extensions:| Concept | Description |
|---|---|
| Extension schema | A schema that defines the structure and behavior of OpenGraph data, including source, custom node and edge definitions, environment identification, and findings. |
| Data payload | The extension-based or generic data generated by an OpenGraph collector that you upload to BloodHound. |
| Extension-based data | Data payloads that conform to an extension schema, enabling enhanced features and support in BloodHound. |
| Generic data | Data payloads that conform to basic OpenGraph node, edge, and metadata schemas only. |
| Collector | A tool that authenticates to a third-party platform and generates a data payload that BloodHound can ingest. |
Manage extensions
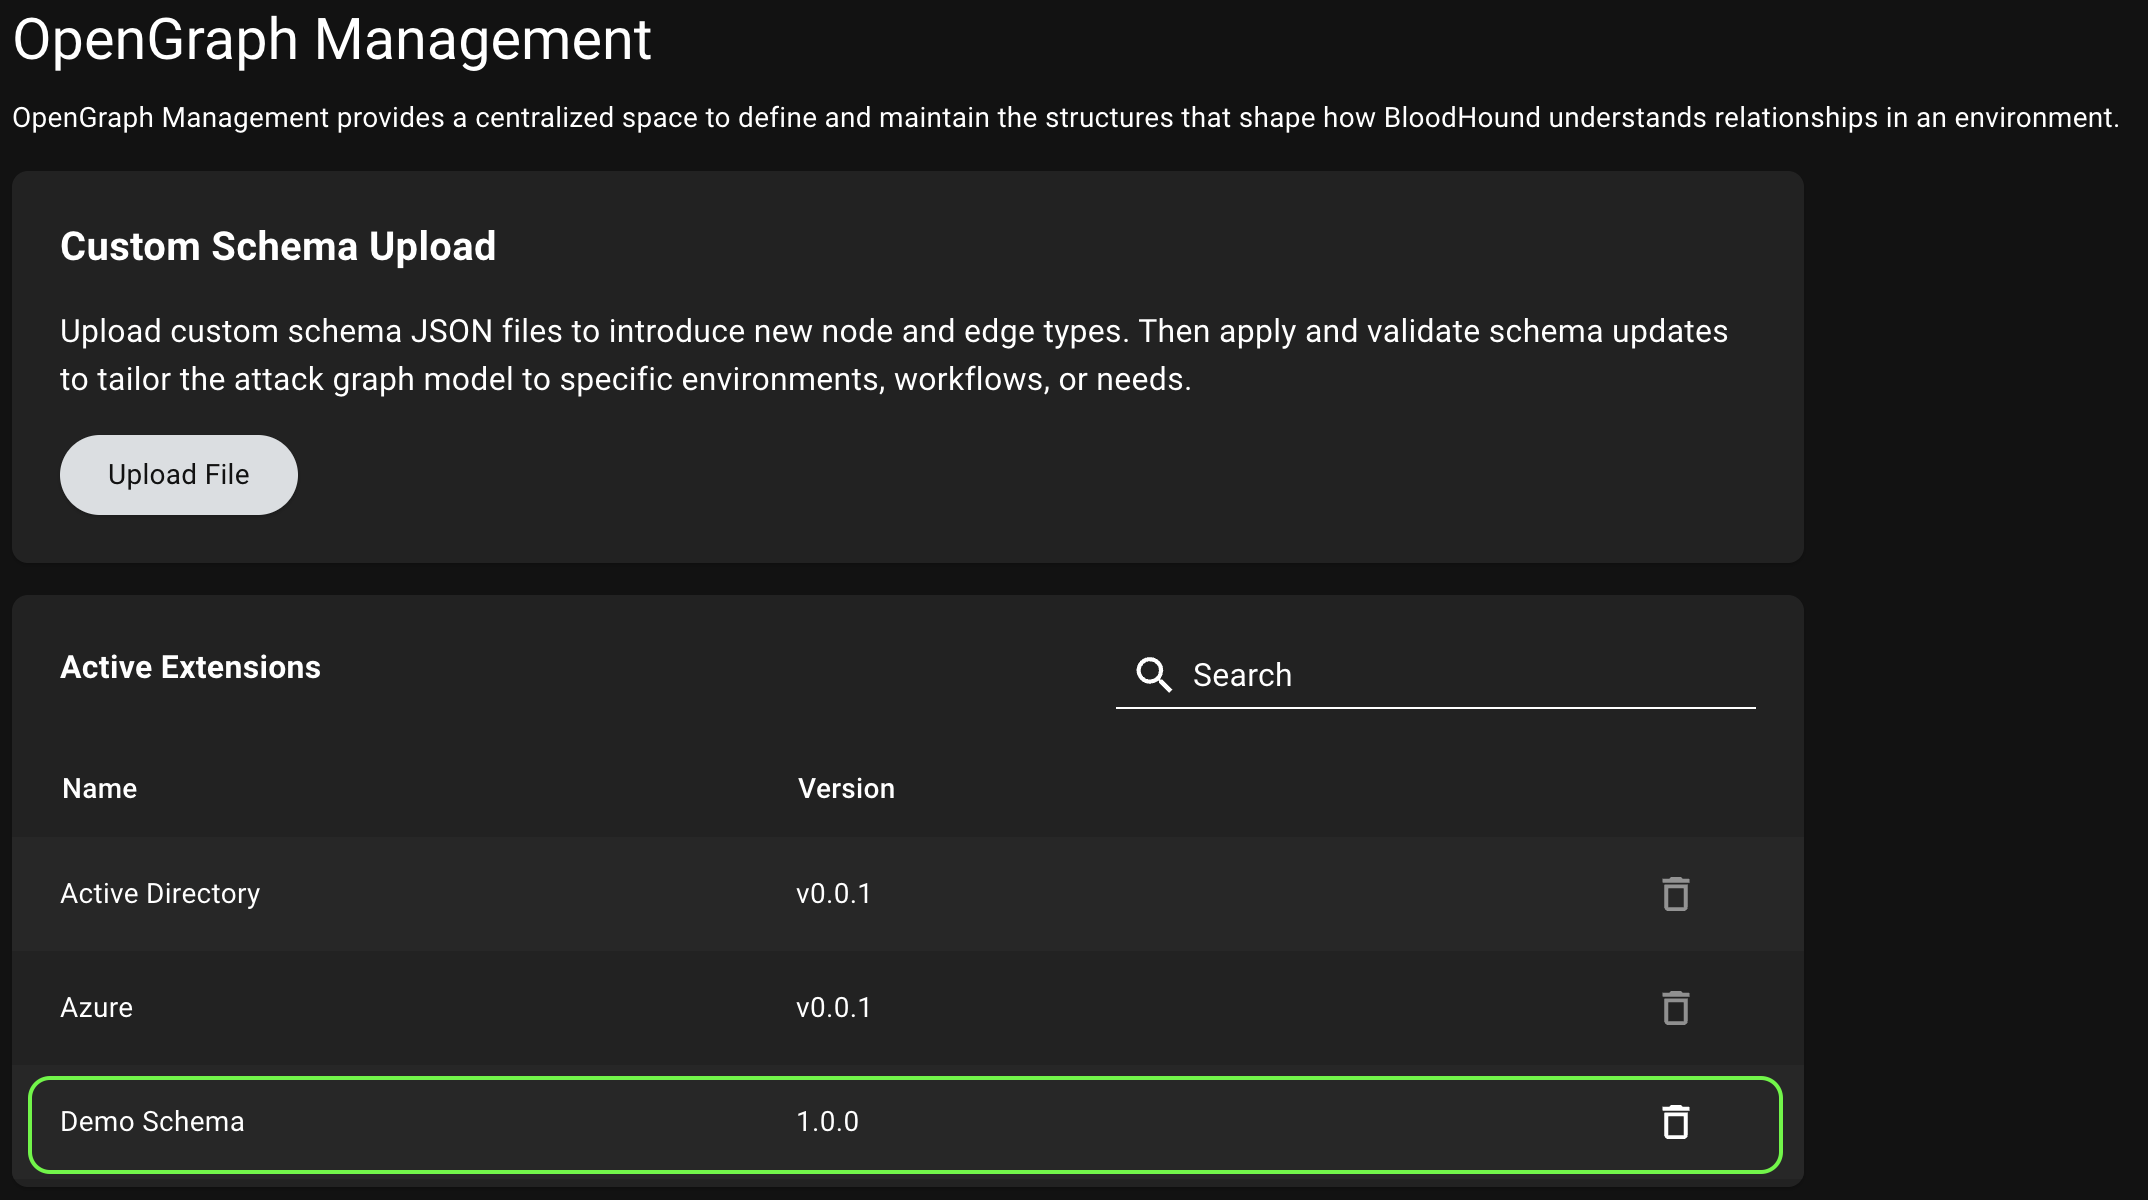
Use the OpenGraph Management page in BloodHound to upload new extension schemas, view active extensions, and delete extensions that you no longer need.Before you begin
Complete the following steps before registering an extension or uploading extension-based data:Get extension artifacts
How you obtain extensions and collectors depends on your edition of BloodHound:
- BloodHound Community users can download and use Community extensions and collectors from public GitHub repositories
- BloodHound Enterprise customers can use both Community and Enterprise extensions and collectors; contact your Technical Account Manager to obtain Enterprise versions
Review prerequisites
After you obtain an extension and collector, review the prerequisites in the extension-specific setup documentation.For example, review collector permissions and required platform configurations, such as API service application registration.
Confirm role access
Confirm that your role includes extension management permissions.
Workflow
The general workflow for extension-based data ingestion involves three main stages that include different steps. The workflow is not strictly linear and not all steps are required. For example, uploading Cypher queries and creating Privilege Zone rules are optional. However, the following diagram provides a high-level overview of the recommended workflow:Register an extension
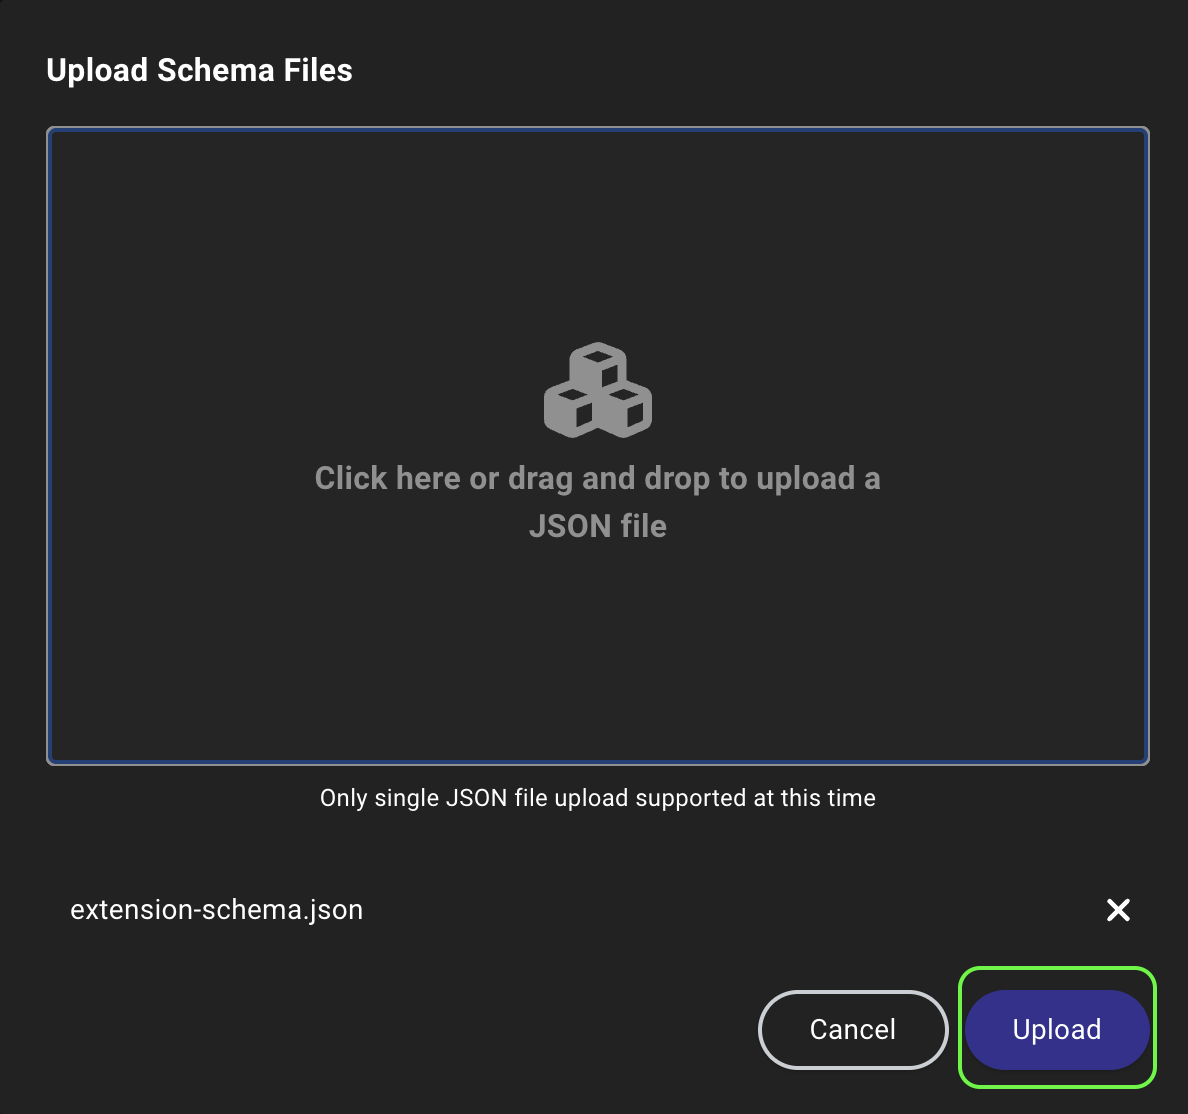
Registering an extension involves uploading the extension schema to BloodHound, which validates the schema and makes it available for use with compatible data payloads. Once registered, you can upload data payloads that conform to the extension schema and take advantage of enhanced features in BloodHound.Upload the extension schema
- Click Upload File to open a file system dialog or drag and drop an extension schema file onto the canvas.
-
Click Upload to begin the schema registration and validation process.
Delete an extension
Deleting an extension removes the extension schema from BloodHound, which disables enhanced features for any data payloads that conformed to that schema. However, the underlying data payloads remain in BloodHound and can still be explored in Search. If you want to delete the data payloads associated with an extension, you can do so separately on the Database Management page. To delete an extension schema, click the (trash) icon next to the extension in the list of active extensions and confirm the deletion in the prompt.You cannot delete built-in extensions that come with BloodHound, but you can delete custom extensions that you have uploaded.
Update an extension
Collectors and extension schemas are versioned separately to allow for more flexible updates, but this requires coordination to maintain compatibility and support. Follow these guidelines for managing updates:- Do not update collectors independently without confirming extension schema compatibility.
- Update collectors and extension schemas together whenever possible.
- For Enterprise, coordinate update cycles with your Technical Account Manager.
Upload data
After an admin registers an extension, users can upload compatible data payloads and take advantage of enhanced features in BloodHound. Follow these steps to use extension-based data:Upload data
Upload a data payload that conforms to the registered extension schema.
- In the left menu, click Quick Upload.
- Click the Upload File canvas to open a file system dialog or drag and drop the data payload file(s) onto the canvas.
- Click Upload to begin the data ingestion and validation process.
Explore and analyze
Use the enhanced features enabled by the extension schema to explore and analyze your OpenGraph data in BloodHound.
| Feature | Description |
|---|---|
| Pathfinding | Use Pathfinding to identify attack paths and analyze relationships between entities in your environment |
| Cypher queries | Import and use extension-specific Cypher queries to perform general searches and create Privilege Zone rules |
| Environment filtering | Filter on schema-defined environments to focus on specific contexts in the Attack Paths, Posture, and Zone Builder pages |
| Findings and remediation | Use findings and remediation information to prioritize and address issues in your environment |